Iron-on patches give you a fast, clean, and convenient way to attach a patch without permanently sewing it in place. But once it is on your jacket, shirt, uniform, or bag, one question naturally comes next: how long do iron-on patches last?
Based on 21 years of hands-on patch production at SMLpatch, feedback from real-world use, and our own testing, we have found that washing frequency and everyday use usually tell you more about patch life than calendar time alone.
In this guide, we’ll show you what affects that lifespan, what our own wash testing found, how to apply and care for an iron-on patch correctly, and what you can do if it begins to peel.
How Long Do Iron-On Patches Last? The Quick Answer
For frequently washed clothing, wash cycles are usually more useful than years when estimating iron-on patch life.
From our practical experience, a properly produced and applied iron-on patch can often reach approximately 200–250 washes under suitable conditions. For rarely washed items such as jackets and bags, the same bond may remain secure for many years.
The actual result still depends on the fabric, adhesive, pressing method, wash frequency, temperature, and everyday use.
Quick Guide by Use Case
Product Common Fabric Wash Frequency Iron-On Suitability Most Important Factor Denim jacket Denim Low Very suitable Correct pressing and care Canvas bag Canvas Very low Very suitable Correct pressing and a flat surface T-shirt Cotton High Suitable Consider sew-on if washed very frequently Jeans Denim Medium Suitable on flat areas Avoid seams and knees Uniform Cotton/poly blends Medium–high Depends on garment Very frequent washing may favor sew-on Hat Various Low Depends on construction Curved or rigid surfaces can cause
uneven pressureActivewear Stretch/synthetic fabrics High Often suitable, case-dependent Stretch, fabric type, and wash frequency
SMLpatch 50-Wash Durability Test
We conducted a 50-cycle wash test using six common patch constructions to see how the adhesive bond performed under the same recorded conditions.
What We Tested
| Patch Type | Size | After 50 Washes |
|---|---|---|
| Embroidered | 10 × 10 cm | No obvious bonding change |
| Chenille | 8 × 10 cm | No obvious bonding change |
| Sublimated | 10 × 6 cm | No obvious bonding change |
| Woven | Ø 6 cm | No obvious bonding change |
| PVC | Ø 4 cm | No obvious bonding change |
| Leather | 6 × 5 cm | No obvious bonding change |
All six samples showed no obvious change in the bond between the patch and fabric after 50 wash cycles under the test conditions.
Test Conditions
Application
- Fabric: Polyester
- Equipment: Professional heat press
- Press temperature: 120°C
- Pressing time: 15 seconds
- Pressure setting: 2P for chenille; 2.5P for the other tested patches
Washing
- Wash temperature: 60°C
- Spin speed: 1400 rpm
- Cycle duration: 60 minutes
- Total wash cycles: 50
- Drying method: Air dry between washes
Test date August 2026
Test Process
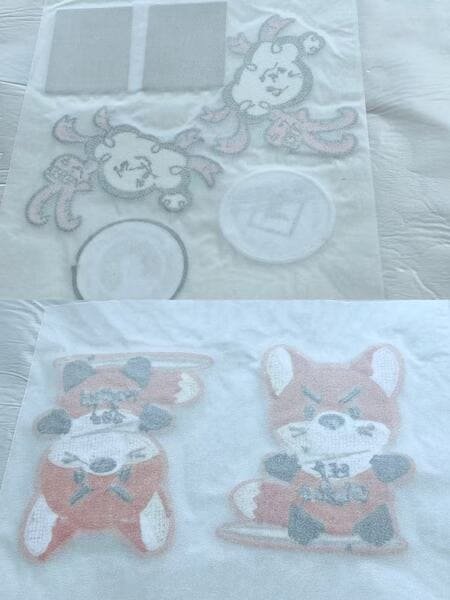
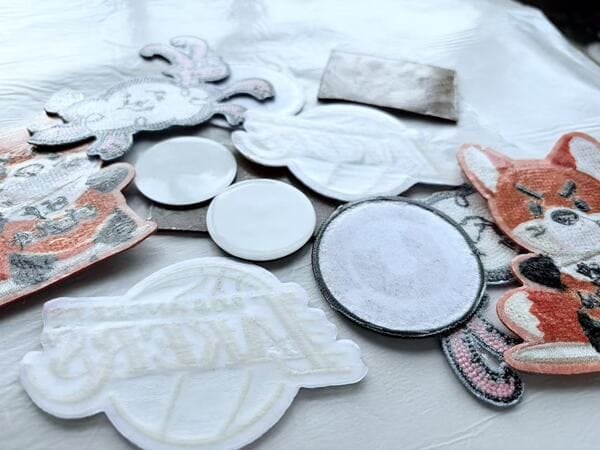
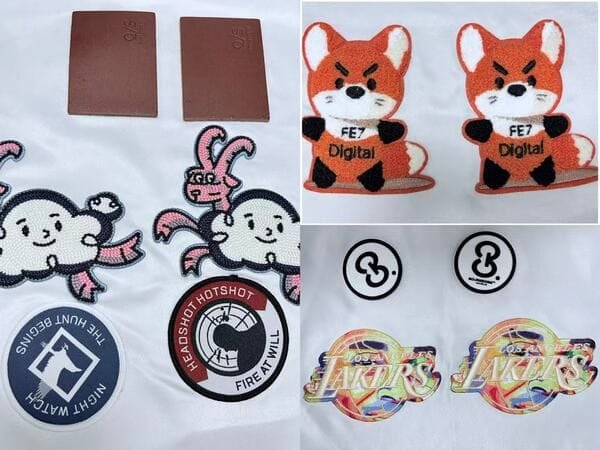

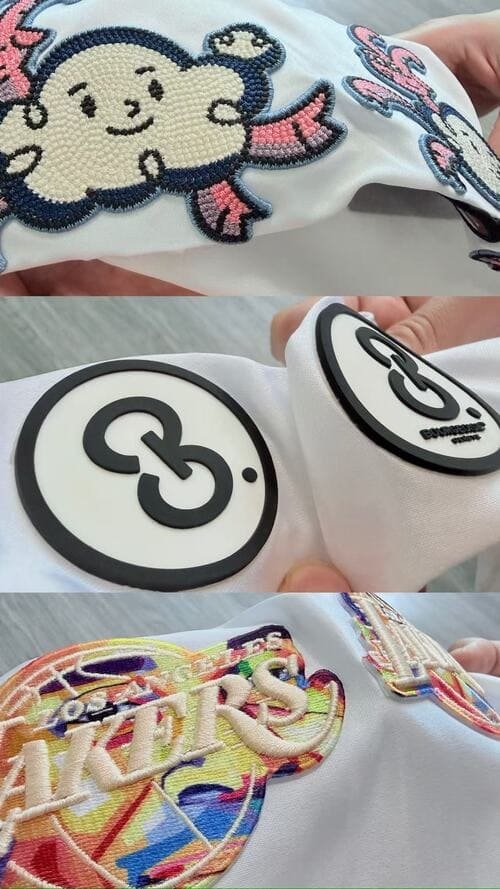
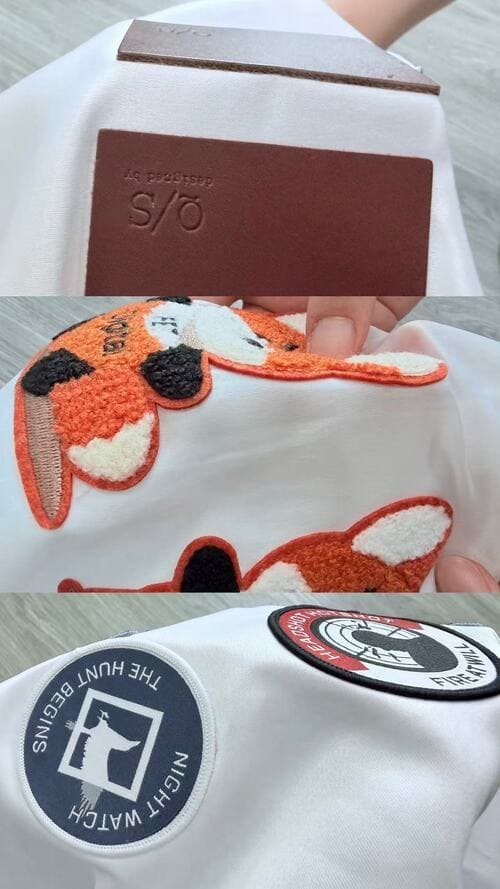
Test Result: No Signs of Detachment
This result shows that when the patch, hot-melt adhesive, fabric, and pressing process are properly matched, an iron-on bond can remain stable through repeated washing. Actual performance will still vary with the materials, application settings, and care conditions you use.
Key Factors That Affect Iron-On Patch Durability
How Hot-Melt Adhesive Choice Affects Durability
Not all hot-melt adhesives behave the same way.
A patch designed for a soft, flexible garment may require different adhesive characteristics from a large structured patch.
At SMLpatch, we commonly work with TPU hot-melt adhesive because it creates a softer, more flexible adhesive layer and can better accommodate a certain degree of fabric stretching during normal use.
We may also use PE hot-melt adhesive where a firmer structure is more appropriate—for example, some large letters, numbers, or patches with larger fabric areas.
This leads to an important buying principle:
The best iron-on patch is not simply the patch with the “strongest glue.” It is the patch whose hot-melt adhesive characteristics match the patch construction, fabric, and required end use.
Different backing materials are designed to achieve different combinations of flexibility, firmness, heat activation, and wash resistance.
How Heat, Pressure, and Time Affect the Bond
For a hot-melt adhesive to bond properly, three factors must be controlled:
temperature + pressure + time
Depending on the adhesive formulation, general activation ranges include:
- Low-temperature adhesive: approximately 100–120°C
- Medium-temperature adhesive: approximately 130–150°C
- High-temperature adhesive: approximately 150–170°C
However, temperature alone does not determine the correct process.
The required pressure and pressing time also depend on:
- The hot-melt adhesive
- Patch construction
- Patch thickness
The most appropriate pressure for one embroidered patch may therefore differ from a thick chenille or other structured patch.
One point needs extra attention: these three variables cannot simply substitute for one another.
If pressure is insufficient, increasing the temperature does not automatically create the correct bond. Too much temperature may damage the fabric or patch before it solves the original bonding problem.
Likewise, insufficient heat cannot always be compensated for by applying excessive pressure.
How Fabric Type Affects Adhesion
The fabric you apply the patch to has a direct effect on how well the hot-melt adhesive can bond.
From our experience, fabrics such as:
- Cotton
- Denim
- Canvas
- Twill
usually provide suitable surfaces for iron-on patches because they are relatively stable and can tolerate the heat required for application.
You need to be more careful with:
- Nylon
- Silk
- Leather
- Waterproof fabrics
- Silicone-rich or heavily coated materials
- Heat-sensitive synthetic fabrics
The challenge is not always the fabric itself. Surface treatments can also affect adhesion.
For example, waterproof or low-surface-energy coatings can make it harder for the softened adhesive to spread across and grip the fabric effectively.
If you are unsure whether your fabric is suitable, check its heat tolerance and surface finish before pressing. Increasing the temperature is not a safe way to compensate for a surface that is difficult to bond.
How Patch Placement Affects Bonding
Even when the fabric is suitable, the placement of the patch can affect how evenly it bonds.
Iron-on patches work best on flat areas where the heat press or iron can apply even pressure across the entire adhesive surface.
We recommend avoiding areas such as:
- Knees
- Cuffs
- Some hat panels
- Certain shoe surfaces
- Areas that fold or bend repeatedly
The main problem is usually not the patch size itself.
Instead, an uneven or curved surface can prevent part of the adhesive from receiving enough heat and pressure. If one edge or section does not bond properly, that area is more likely to begin lifting first.
Before applying the patch, place it on the garment and check whether the entire backing can sit flat. If not, another position—or a sew-on attachment—may give you a more reliable result.
How Pressing Equipment Affects Durability
The equipment you use also affects how consistently the adhesive is activated. A household iron and a professional heat press can both work, but they are suited to different expectations.
Household Iron
A household iron is convenient, easy to use, and practical for small personal projects. You do not need specialized equipment, so it is a good option when you simply want to attach a patch at home.
The limitation is consistency. Hand pressure can vary, and the temperature across the iron may not be as even as a professional press.
If you do not need the patch to remain attached for several years—or you enjoy changing to a different design after a period of use—a household iron can be a practical choice when used with the correct instructions.
Professional Heat Press
A professional heat press gives you more consistent control over temperature, pressure, contact area, and pressing time.
This makes application faster and more repeatable, especially when you are producing multiple pieces. It is the better choice when consistent quality matters, when you are working with larger quantities, or when you want the patch to remain securely attached for long-term use.
Whichever method you use, do not compensate for insufficient pressure by simply increasing the temperature.
How to Apply an Iron-On Patch Step by Step
Recommended Application Process
Step 1: Prepare the Garment
Make sure the application area is clean, dry, flat, and able to tolerate the required heat. This helps the adhesive make even contact with the fabric.
Step 2: Position the Patch Accurately
Place the patch in its final position before applying heat so it will not need to be moved once the adhesive begins to activate.
Step 3: Press From the Front for Approximately 7–9 Seconds
Press from the front to hold the patch in place and prevent it from shifting during the main bonding step.
Step 4: Turn the Garment Over and Press From the Reverse Side for Approximately 15–20 Seconds
Apply steady, even pressure from the back so the heat can reach the hot-melt adhesive more directly and activate the bond.
Step 5: Let the Bond Cool and Stabilize Before Washing
Keep the garment flat and avoid pulling or folding the patch while it is still warm. Allow it to cool completely, and wait approximately 24 hours before the first wash so the adhesive has enough time to stabilize.
These times are general working references. The exact temperature, pressure, and pressing time should be adjusted according to the patch construction, hot-melt adhesive, fabric type, and fabric thickness.
Common Application Mistakes
Avoid:
- Insufficient pressure
- Incorrect temperature
- Trying to compensate for low pressure with excessive heat
- Using a flat press on an unsuitable curved surface
- Moving the patch before the adhesive stabilizes
- Washing too soon
How to Wash Iron-On Patches Without Making Them Peel
How you wash the garment after application also affects how long the patch stays securely attached.
Wait at least 24 hours before the first wash.
When practical:
- Turn the garment inside out
- Avoid unnecessary high-temperature washing
- Avoid strong acids, alkalis, and highly corrosive chemicals
- Do not deliberately pull or lift the patch edges
The reason for turning the garment inside out is straightforward—it helps reduce accidental mechanical damage to the patch and its edges during washing.
For frequently washed products such as uniforms and everyday workwear, you should also consider whether sew-on construction may better match the intended service life.
What Should You Do if an Iron-On Patch Starts Peeling?
Do not begin by automatically reheating it.
The first step is inspection.
Step 1: Check the Patch Itself
Look at the decorative patch construction.
If the patch has suffered extensive damage, repair may no longer be practical and replacement is usually the safer choice.
If the damage is minor and localized, repair may still be possible depending on the patch type.
Step 2: Check the Adhesive Layer
If the patch itself remains intact, examine the hot-melt adhesive.
There are two common situations.
The adhesive layer is still intact, but it has separated from the underside of the patch or fabric
In this situation, the adhesive may be reactivated by following the correct heat-press procedure.
The adhesive layer itself is damaged
If the patch remains usable, a new compatible hot-melt adhesive layer can be placed between the patch and the fabric before pressing again.
For SMLpatch products, if a customer encounters this type of adhesive problem, our team can help evaluate the condition and provide a suitable adhesive layer for reapplication when appropriate.
The important rule is:
Diagnose first; repair second.
Do not simply apply more and more heat without understanding what has failed.
Iron-On vs. Sew-On: Which Should You Choose?
Iron-on works particularly well when you want:
- Fast installation
- A clean finish without visible sewing
- Convenient application
- A patch that does not need permanent stitching
Sew-on is often preferable when:
- The garment is washed extremely frequently
- Permanent attachment
- The application area cannot be pressed evenly
- The fabric does not tolerate the required temperature
Frequently Asked Questions
A properly applied iron-on patch can remain attached for a long time, but the hot-melt adhesive is still affected by washing, heat, fabric, application quality, and use conditions.
Normally, a properly applied iron-on patch should not come off during regular washing.
The first wash deserves extra attention—allow the adhesive to fully stabilize before washing, and we recommend waiting approximately 24 hours after application. After that, appropriate wash temperatures and gentle care will help maintain the bond.
Yes, a professional heat press generally makes the application process more consistent because temperature, pressure, and time can be controlled more reliably.
Often, yes—but inspect it first.
If the patch is intact and the adhesive layer remains usable, correct reheating may restore the bond.
If the adhesive layer is damaged, a new compatible adhesive layer may be needed before repressing.
If the patch itself has suffered extensive physical damage, replacement may be more appropriate.
Yes. If you have already ironed on the patch but want extra security, you can simply stitch around the edge.
The iron-on backing keeps the patch in position, while the stitching provides additional long-term reinforcement.
What to Consider Before Ordering Custom Iron-On Patches
A durable iron-on patch does not come from one factor alone.
It is the result of four things working together:
A properly made patch + the right hot-melt adhesive + the correct heat-press process + appropriate use and care.
If all four are matched correctly, an iron-on patch can provide both the convenience that makes this backing popular and the durability required for repeated everyday use.
Before ordering custom iron-on patches, tell SMLpatch:
- Your garment material
- Patch size and construction
- Intended application
- Expected wash frequency
- Whether permanent attachment is required
With that information, our team can recommend a patch construction and backing system based on how the finished product will actually be used.