Maybe the patch was applied in the wrong position, the design no longer suits you, or you simply want to replace it. Whatever the reason, removing an iron-on patch takes a little care—pulling it off directly can damage the fabric or leave stubborn adhesive behind.
The safer approach is to soften the adhesive with controlled heat, peel the patch gradually, and deal with any remaining glue separately. Below, we’ll walk you through the process step by step, including what to do when the patch will not come off easily and how to handle leftover adhesive.
Before You Remove the Patch: Check These 3 Things First
Confirm How the Patch Is Attached
Before using heat, first confirm how the patch is attached to the garment.
Start by gently trying to lift one small corner of the patch. If it peels away easily without heat, it is more likely to have a self-adhesive backing rather than an iron-on backing. In that case, see our detailed guide on how to remove a self-adhesive patch safely.
If the corner does not lift easily, look closely at the space between the patch and the fabric. You will usually see one of two situations: the patch is connected by visible stitching, or the patch sits tightly against the fabric with little or no visible gap.
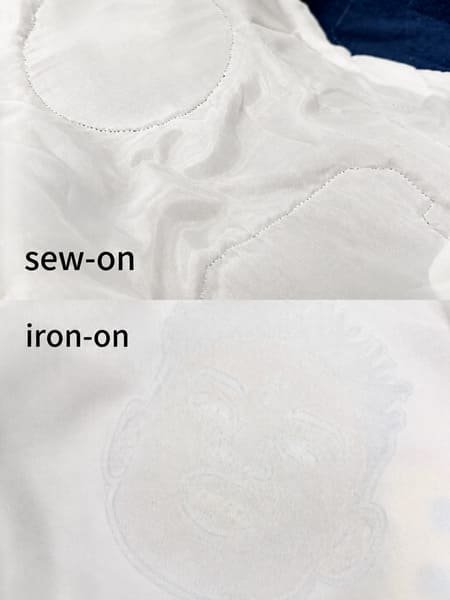
Next, turn the garment inside out and inspect the area directly behind the patch. If a lining prevents you from seeing the back clearly, gently feel the area.
- No visible stitching and the whole patch sits firmly against the fabric: it is most likely an iron-on patch.
- Stitching runs around the patch edge and the patch is also firmly bonded to the fabric: it may be an iron-on + sew-on patch. Remove the stitches before trying to release the adhesive.
- Stitching runs only around the patch edge and the center of the patch separates freely from the garment: it is more likely a sew-on patch.
- Dense stitching covers the entire design on the reverse side of the garment: the design is probably embroidered directly onto the garment rather than being a separate patch. We generally do not recommend removing direct embroidery yourself because the process can easily damage both the fabric and the embroidery.
Check the Fabric Care Label
Next, check the garment label for its fiber content, ironing limits, and any warnings about steam or high temperatures.
- Lower risk: Cotton, denim, and canvas generally tolerate controlled heat better.
- Use more caution: Polyester, nylon, jerseys, blends, and stretchy fabrics can become shiny, distorted, or damaged if overheated.
- High risk: Silk, lace, delicate rayon, coated fabrics, specialty finishes, and leather require much more care. If the label prohibits ironing, professional cleaning may be the safer choice.
These categories are a starting point, not permission to skip testing. Even two garments made from similar fibers can react differently because of dyes, finishes, or fabric construction.
Decide Whether You Want to Reuse the Patch
If you want to keep the patch, remove it more slowly and avoid sharp tools or strong solvents directly on its surface.
Even if the patch itself remains intact, the original iron-on backing may be uneven or contaminated after removal. You may need to add new backing or sew the patch on before using it again.
What You’ll Need
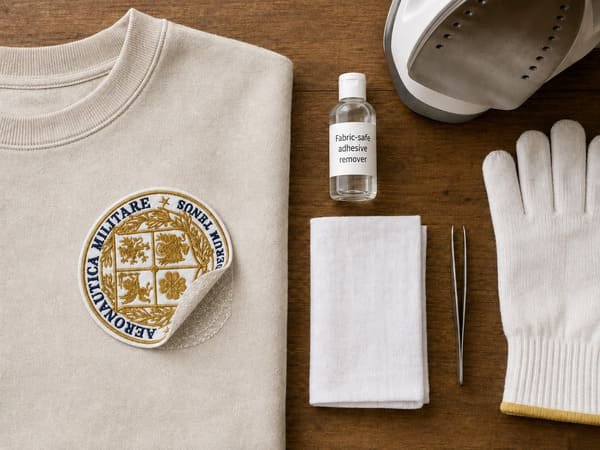
You only need a few basic items:
- Household iron or hair dryer
- Thin cotton pressing cloth
- Tweezers or a blunt plastic edge
- Heat-resistant glove or folded towel
- Fabric-safe adhesive remover
Work on a stable, heat-resistant surface with good lighting.
You do not necessarily need specialist tools. A clean, thin cotton T-shirt can substitute for a pressing cloth, while the smooth edge of a plastic card can help lift a corner if you do not have a suitable patch-removal tool.
How to Remove an Iron-On Patch Safely: Step by Step
Step 1: Test Heat on a Hidden Area
Choose an inconspicuous area made from the same fabric. Cover it with your pressing cloth and apply a low heat setting for a few seconds.
Then check for:
- discoloration
- shine
- melting
- stiffness
- distortion
If you notice any obvious and unacceptable change—such as discoloration, shine, melting, or distortion—the fabric is not tolerating the heat well, so we recommend stopping the removal process.
Step 2: Apply Controlled Heat to Soften the Adhesive
Keep the heat within the temperature range the fabric can safely tolerate. Start with a low, gently warm setting and increase the temperature gradually only if needed.
From our experience, lightly misting the patch area with water before heating can sometimes make the adhesive layer easier to release. This step should be skipped if the garment care label warns against moisture or steam.
Then think about where the adhesive layer is.
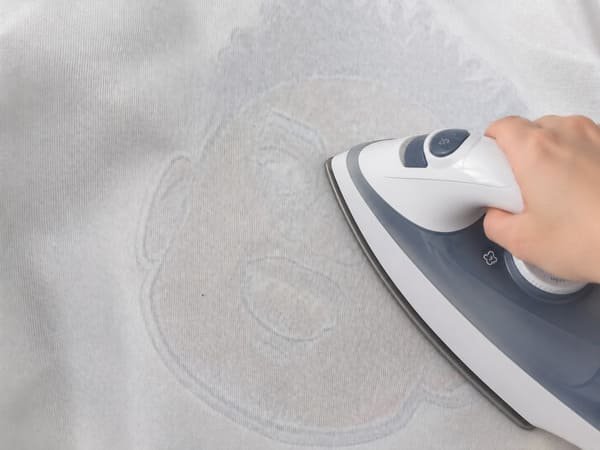
For a thin garment, heating from the reverse side often brings the heat closer to the iron-on backing. With thicker materials, heating from the patch side through a pressing cloth may work better.
There is no need to keep the iron in one place for a long time. Apply heat for a short interval, then test the patch before heating again.
Step 3: Lift One Corner—Do Not Pull Yet
Use tweezers or a blunt plastic edge to gently test one corner.
At this stage, you are only checking whether the adhesive has softened. You are not trying to pull the whole patch off.
If the corner still cannot be lifted and the adhesive remains firmly bonded, increase the temperature slightly within the fabric’s safe heat range and try again.
Step 4: Peel Slowly While Supporting the Fabric
Once the corner begins to release, hold the garment close to the patch with one hand and peel with the other.
Keep your pulling angle low and gradual rather than lifting the patch straight upward.
If you feel strong resistance, stop. Pulling harder usually does not solve the adhesive problem. It simply transfers more force to the fabric underneath.
Step 5: Reheat Small Sections Instead of Forcing the Patch
Work section by section:
Heat → lift → peel a little → reheat when resistance returns.
From our experience, this is more reliable than heating an entire patch once.
For example, if you heat a large patch from edge to edge and begin peeling from one corner, the opposite side may already have cooled by the time you reach it. You then end up pulling harder even though the real problem is simply that the adhesive needs to be softened again.
When the Patch Resists: Safe Next Steps
Increase Heat Gradually Within the Fabric’s Limit
If the first setting is not enough, raise the temperature slightly—but always stay within the garment’s care instructions.
For curved or awkward areas such as hats and bags, a hair dryer can also provide more gradual heat, although it may take longer.
Do not assume that hotter always means better. Once you reach the fabric’s safe limit, continuing to increase the temperature creates more risk without guaranteeing that the patch will release.
Try a Fabric-Safe Adhesive Remover
If only a small area remains firmly bonded, a mild fabric-safe adhesive remover may help.
Before using it on the visible area:
- Test it somewhere hidden.
- Check for color or texture changes.
- Use only a small amount.
- Follow the cleaner’s instructions.
- Give it time to work before peeling again.
Avoid saturating the garment with solvent.
Know When to Stop
Stop if you notice:
- color changes or shiny areas
- fibers beginning to distort
- a plastic or burnt smell
- the garment lifting or stretching with the patch
- no movement even at the highest temperature the fabric can safely tolerate
A patch can become difficult to remove because of the adhesive formulation, backing thickness, application pressure, fabric structure, or how long it has been attached.
If it still shows no sign of releasing, do not keep increasing the heat simply to force it off.
If the patch still does not release after you have reached the highest temperature the fabric can safely tolerate, stop rather than forcing it off. Continuing to increase the heat or pull harder may permanently damage the garment. For valuable or delicate fabrics, consider asking a professional cleaner experienced with textiles and adhesives for help.
How to Remove Iron-On Patch Glue After the Patch Is Off
After removing an iron-on patch, it is normal to find some adhesive residue on the fabric, the back of the patch, or both.
Start With the Mildest Method
For light residue, begin with warm water and mild detergent if the garment is washable.
Blot or rub gently rather than aggressively scrubbing the area. Sometimes a thin residue can be removed without introducing a stronger cleaner at all.
For Sticky Residue, Use a Suitable Cleaner
If the adhesive remains tacky, rubbing alcohol may work on some colorfast fabrics, or you can use a fabric-safe adhesive remover.
Always test it in a hidden area first.
Iron-on backings do not all use exactly the same adhesive formulation, and different fabrics react differently to cleaning products. That means there is no single remover that is suitable for every patch and every garment.
Why Some Iron-On Patches Are Harder to Remove
Two similar-looking patches can behave very differently during removal.
A patch that has been attached for a long time may have gone through repeated washing, tumble-drying, pressure, dirt exposure, and fabric movement. Application conditions matter too—a thicker adhesive layer, stronger pressure, a larger patch, or a rough and porous fabric can create a more stubborn bond.
In simple terms: Backing + fabric + application conditions all affect removal.
That is why a newly applied patch on cotton may release very differently from an older patch on a textured jacket.
Marks You May See After Removing the Patch
A Faint Adhesive Outline
A light sticky outline usually means that some adhesive is still present.
Continue with the residue-cleaning steps rather than reheating the entire area again.
A Darker or Lighter Patch-Shaped Area
The surrounding fabric may have gradually faded from sunlight, washing, and friction while the area underneath the patch remained protected. If that is the case, cleaning alone will not necessarily remove the color difference.
Slight Texture or Compression Marks
Fleece, brushed fabrics, and other soft textiles may look flattened where the patch was attached.
Washing, normal wear, or gentle steaming—if the care label allows it—may help the fibers recover, although the fabric may not return completely to its original appearance.
If the remaining mark still bothers you, covering the area with another patch you like can be a practical solution. Depending on the garment, you can iron on a new patch or sew one in place.
Can You Reuse an Iron-On Patch After Removing It?
If the embroidery, border, and patch base remain intact, the patch itself may still be reusable.
If the remaining mark still bothers you, covering the area with a new patch you like can be a practical solution. You can iron it on or sew it in place depending on the garment. If you need a patch made for a specific size, shape, or design, we can also help you customize one that fits the area.
Common Mistakes to Avoid
- Pulling the patch while the adhesive is cold
- Starting with the highest heat setting
- Using a knife or blade underneath the patch
- Applying strong solvents without testing them first
- Putting the garment in the dryer while adhesive residue remains
Frequently Asked Questions
There is no universal time. Fabric thickness, patch size, adhesive, and iron temperature all matter. Use short intervals of several seconds, test the edge, and repeat as needed instead of continuously heating one area.
Usually, but polyester requires more careful heat control than cotton or denim. Start low, use a pressing cloth, follow the care label, and stop if the surface becomes shiny or distorted.
Start with mild detergent and warm water when suitable. For stubborn residue, a compatible fabric-safe adhesive remover or rubbing alcohol may help. Always spot-test it first.
Yes. A hair dryer can gradually soften the adhesive and may be useful for curved or awkward areas, although the process can take longer.