Have you ever placed a patch on a hat, thought it looked perfectly straight, and then put the hat on only to find that it looked slightly off? You’re not alone—the curved shape of a hat can make a simple sewing job a little trickier than it first appears.
Whether you’re giving an old cap a new look or adding a custom patch to your favorite hat, you don’t need complicated tools to get a clean result. In this guide, we’ll walk you through how to sew a patch on a hat by hand or with a sewing machine, along with a few practical tips that can make the process much easier.
Before You Sew: Check Your Hat and Patch
Before picking up your needle, take a moment to look at both the hat and the patch. Their structure will affect how easy the job is and how you should handle the fabric.
Check the Shape of the Hat
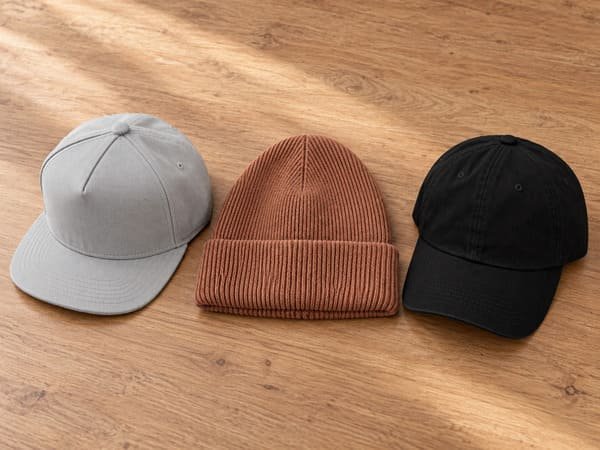
Different hat styles behave differently during sewing.
- Structured baseball caps have firmer front panels that hold their shape.
- Unstructured caps are softer and easier to move while sewing.
- Knit hats and beanies stretch more easily and need gentler thread tension.
The basic sewing process does not change much, but the amount of support and thread tension you need will.
- Knit hats and beanies: Keep the tension light and flexible, as pulling too tightly can easily stretch or pucker the knit fabric.
- Structured baseball caps: Use steady, moderate tension—the firm crown already provides support, so there is no need to pull the stitches excessively tight.
- Unstructured caps: Use light to moderate tension so the softer fabric stays smooth instead of gathering around the patch.
Check the Patch Edge and Backing
Next, look at the edge of your patch.
Embroidered and woven patches with a clean merrowed or stitched border are usually easy to sew. You can place your new stitches close to the existing border, making them much less noticeable.
Also check the back of the patch.
If the back has a smooth adhesive layer, it may be an iron-on patch. On softer hats that tolerate heat, ironing may be enough on its own. On some firmer hats, you can also use light heat to hold the patch temporarily in place before sewing around the edge for additional security.
Hand Sewing or Machine Sewing?
Both methods can work. The better choice depends on the hat, quantity, and the finish you want.
| Situation | Recommended Method |
|---|---|
| A small number of hats | Hand sewing |
| A strongly curved placement | Hand sewing |
| A difficult-to-reach placement | Hand sewing |
| A handmade or one-of-a-kind look | Hand sewing |
| Soft, easy-to-handle caps | Regular sewing machine may work |
| Multiple hats or production work | Hat-capable or cylinder-arm equipment |
We’ll cover both hand sewing and machine sewing below so you can choose the method that suits your hat.
What You’ll Need
You do not need many tools.
Prepare:
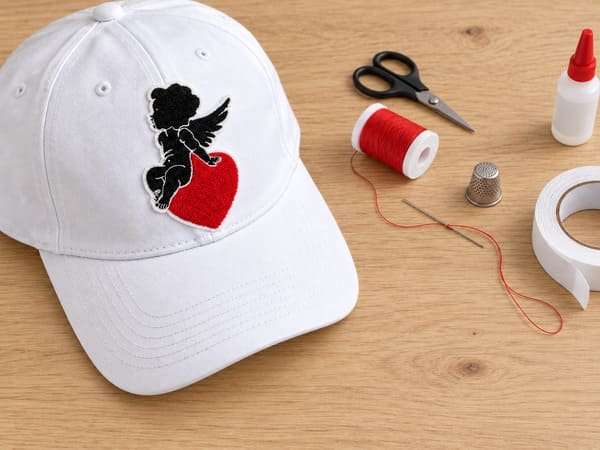
- Your hat
- Your patch
- A suitable sewing needle
- Matching polyester thread
- Scissors
- A thimble
- Temporary fabric adhesive or double-sided fabric tape
Matching the thread color to the patch border is especially helpful if you want the finished stitches to be less visible.
How to Sew a Patch on a Hat by Hand
Hand sewing is a good option when you are working with only a few hats or when the shape of the crown makes machine sewing difficult.
Step 1: Position the Patch
Put the hat on or keep the crown in its natural shape.
Check three things:
- Center
- Height
- Angle
Do not completely flatten the crown just to make positioning easier.
A patch placed on a flattened hat can sit differently once the crown returns to its normal curved shape. What matters is how the patch looks when the hat is actually worn.
Step 2: Hold the Patch in Place
Once you are happy with the position, prevent the patch from shifting.
You can use:
- Temporary fabric adhesive
- Double-sided fabric tape
Use only enough to hold the patch while you sew.
This is especially helpful on curved crowns, where even a small movement can make the patch look crooked.
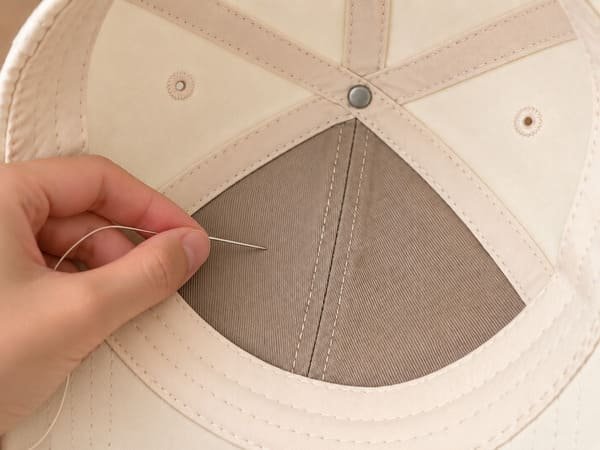
Step 3: Start Stitching From Inside the Hat
Move the sweatband out of the way before you start.
Thread your needle, tie a knot, and begin from inside the hat so the knot remains hidden.
Take a moment to locate the correct starting point before pushing the needle through. Aim to bring the needle out close to the patch border.
Using a thread color similar to the border will help keep the stitches discreet.
Step 4: Sew Around the Patch Edge
Work slowly around the edge using small, even stitches.
Keep the stitches close enough to the patch border to secure it without covering the design.
A few practical points matter here:
- Do not pull the thread too tight.
- Follow the natural curve of the hat.
- If the fabric starts puckering, reduce the tension.
- Add an extra stitch around corners or pointed areas if they tend to lift.
You do not need complicated decorative stitching. Consistent tension and accurate placement are more important.
Step 5: Secure the Thread and Check the Patch
When you reach the starting point, tie off the thread securely inside the hat.
Then inspect the patch:
- The corners
- Any raised edges
- Fabric puckering
Finally, put the hat on again.
The patch should look straight and natural when the crown returns to its normal shape.
How to Sew a Patch on a Hat With a Sewing Machine
A regular sewing machine can work on some hats, especially softer or less structured caps. The main difficulty is usually access rather than the stitching itself.
Position and Mark the Patch Carefully
Position the patch while keeping the crown as close as possible to its natural shape.
Move the sweatband away from the sewing area.
If necessary, use temporary fabric adhesive to hold the patch in place. You can also use a removable fabric pen to make small reference marks around the position before sewing.
Sew Slowly Around the Patch
Start at a slow speed and guide the hat carefully.
Keep the patch flat against the natural curve of the crown rather than forcing the entire hat flat.
When you reach a curve or corner:
- Stop with the needle down.
- Lift the presser foot if necessary.
- Turn the hat slightly.
- Continue sewing.
The brim can limit how far the hat moves around a regular machine. Do not bend or force it just to complete the stitching.
When Should You Avoid a Regular Sewing Machine?
A regular flat-bed sewing machine may not be the best option when:
- The crown is very stiff.
- The patch sits very close to the brim.
- There is not enough room to rotate the hat.
- The front panel is too thick to move comfortably under the machine.
In these situations, hand sewing may give you better control for a small project.
Common Mistakes When Sewing Patches on Hats
Small mistakes often become much more noticeable once the hat is worn.
The Patch Looks Straight on the Table but Crooked When Worn
This usually happens because the hat was flattened during positioning.
Keep the crown in its normal shape and check the patch while wearing the hat before sewing.
The Hat Fabric Puckers Around the Patch
Puckering is often caused by:
- Excessive thread tension
- Stretchy fabric
- Forcing the patch onto the wrong curve
Reduce the tension and allow the fabric to sit naturally beneath the patch.
Stretchy knit hats may also benefit from light stabilization.
The Patch Corners Start Lifting
Corners and pointed sections experience more movement than straight edges.
Add one or two extra securing stitches in these areas rather than tightening the entire row of stitches.
The Sweatband or Brim Gets in the Way
Move the sweatband out of the sewing area before you begin.
When machine sewing, remember that the brim can restrict movement. Stop and reposition the hat instead of forcing the brim around the machine.
Does the Sewing Method Change for Different Hats?
The basic method stays similar, but each hat structure requires slightly different handling.
| Hat Type | What to Watch For |
|---|---|
| Structured baseball cap | Keep the natural crown shape; thicker front panels may be harder to pierce |
| Trucker hat | Pay attention to the transition between the structured front panel and mesh |
| Soft or unstructured cap | Usually easier to maneuver by hand or machine |
| Beanie or knit hat | Avoid pulling stitches too tight and stabilize stretchy fabric if needed |
Frequently Asked Questions
Small, consistent stitches that catch both the patch border and hat fabric are usually enough. A simple whip stitch can also work well when used neatly around the edge. The most important thing is even tension.
Yes, in some cases. Soft or unstructured caps are generally easier because they can move more freely under the machine.
No. Move the sweatband away before sewing so your stitches attach the patch to the hat panel rather than accidentally sewing the sweatband into place. This also keeps the inside of the hat cleaner and more comfortable to wear.
Want to Create a Hat Patch of Your Own?
Want to make your hat truly your own? Send us your artwork, sketch, or even a simple idea, and we can help turn it into a custom patch made around your design.
Once your patch is ready, it doesn’t have to stay on just one hat—you can use the same idea to give your clothing, bags, and other everyday pieces a look that feels uniquely yours. Have an idea in mind? Send it to us and let’s turn it into a patch you can actually wear.