
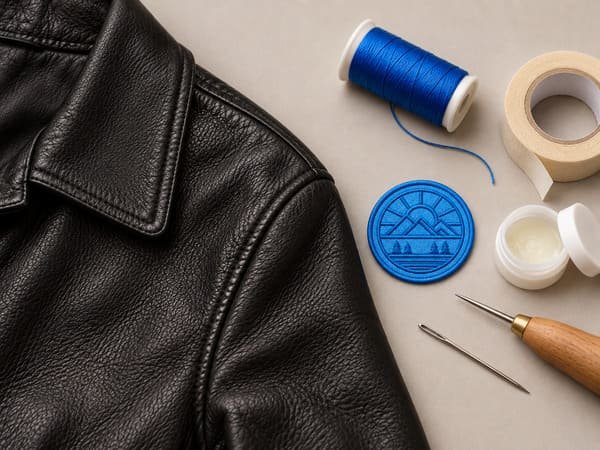
Sewing a patch onto leather can be straightforward, but a little preparation makes a big difference. With the right tools, careful positioning, and a suitable hand-sewing method, you can keep the patch secure while maintaining a clean, neat finish.
In this guide, we’ll walk through what to prepare, how to position and sew the patch by hand, and what to watch for when working with thicker leather or lined jackets and vests.
What to Know Before Sewing a Patch on Leather
Leather is less forgiving than woven fabric because every needle pass creates a hole in the material. Repeatedly removing and restitching a patch can leave visible marks, while stitches placed too close together may weaken the leather along the stitch line.
Before you begin, focus on two things: confirm the patch position carefully and keep your stitch spacing even. A little extra preparation now can prevent unnecessary holes later.
What You Need Before You Start
Before you start, prepare
- a leather needle
- strong polyester thread
- low-tack tape
- temporary leather-safe adhesive
- an awl if the leather is particularly thick
Based on our hands-on experience, a few of these tools are worth choosing more carefully because they can directly affect how smoothly the sewing process goes.
Choose the Right Needle and Thread
For most hand-sewn leather patches, we recommend:
- Needle: a leather needle
- Thread: strong polyester thread
- Optional helpers: a thimble and small pliers
A leather needle is designed to pass through leather more effectively than a fine everyday sewing needle, which may bend or break when too much force is applied.
Polyester thread is also a practical choice because it offers good strength and abrasion resistance. Very fine cotton thread is less suitable for this job—it can fray and become thinner as it repeatedly rubs against the edges of the needle holes.
Prepare Tape and Temporary Adhesive
Two temporary fixing tools can be useful, but they serve different purposes.
Low-tack, residue-free tape is useful when you want to hold the patch roughly in place while checking the position—especially if you need to try on a jacket or vest before deciding where the patch should sit.
Once the final position is confirmed, use a small amount of temporary leather-safe adhesive behind the patch to stop it from shifting while you sew. Avoid using positioning pins, as they create unnecessary holes in the leather.
Keep the adhesive away from the main stitch line whenever possible so it does not make the needle harder to push through.
Check the Patch and Garment Before Sewing
Before sewing, take a quick look at both the patch and the leather item.
Patch edge: A patch with a clear, finished border is easier to sew neatly because the edge gives you a consistent stitch path.
Backing: A sew-on backing is usually the simplest option for hand
sewing. Thicker backing layers can add unnecessary resistance when the needle passes through the patch.
Overall thickness: Consider the combined thickness of the patch and leather. If both are very thick, you may need stronger thread or pre-punched holes.
Lining: If you are working on a lined jacket or vest, check whether you can access the outer leather without sewing directly through the lining.
How to Sew a Patch on Leather by Hand
For most leather jackets, vests, bags, and similar items, hand sewing gives you good control over placement, stitch spacing, and tension.
The steps below follow the hand-sewing process we generally recommend based on our experience working with patches and different leather applications.
Step 1: Confirm the Patch Position Before Making Any Holes
Lay the leather item on a flat surface and place the patch where you want it.
Use seams, pockets, zippers, or the center line of the garment as visual references to make sure the patch is straight.
If possible, step back and look at the whole garment rather than judging the position from only a few inches away.
For jackets and vests, it can also help to try the garment on before committing to the final position. A patch that looks perfectly straight when a jacket is lying flat may sit differently once the leather curves around your body.
This is especially useful for chest, shoulder, and side placements.
Step 2: Secure the Patch in Place
Once you are satisfied with the position, apply a small amount of temporary leather-safe adhesive behind the patch.
Press it gently into place and check the alignment again.
The adhesive is not meant to replace stitching. Its job is simply to prevent the patch from rotating or sliding while you work around the edge.
Keep the adhesive away from the main stitch line whenever possible, as too much adhesive can make the needle harder to push through.
Step 3: Decide Whether You Need to Pre-Punch the Holes
Pre-punching is not necessary for every leather project.
If a leather needle passes comfortably through softer or thinner garment leather, you can usually sew directly.
If the leather is thick, the patch edge is dense, or pushing the needle through requires excessive force, use an awl to prepare the stitch holes first.
If you are unsure, test the resistance in an inconspicuous area or on a scrap piece of similar leather. Pre-punch only when it makes the sewing cleaner and easier to control.
Step 4: Start From the Inside
Cut a manageable length of thread, thread the needle, and tie a secure knot at the end.
Avoid using an excessively long piece of thread, as it is more likely to twist or tangle while you work.
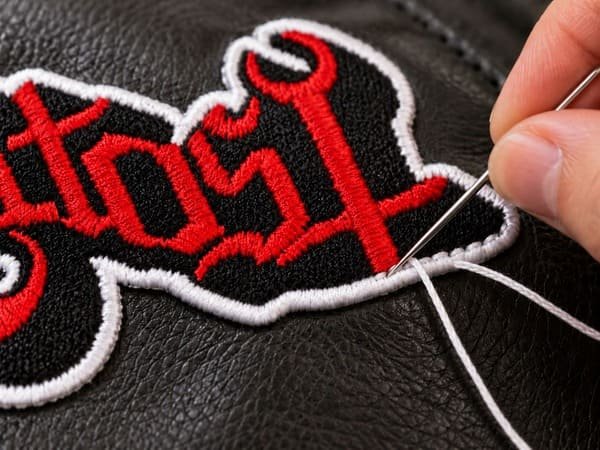
When the garment construction allows it, start from the inside and bring the needle up close to the patch border. This keeps the knot hidden and gives the finished patch a cleaner appearance.
Pull the thread until it sits snugly against the leather, but do not overtighten it. The patch should stay flat without pulling or puckering the leather underneath.
Step 5: Choose the Stitching Method and Keep It Even
For most patches on ordinary garment leather, simple, evenly spaced hand stitching is usually the easiest and quickest option. It provides good control and is secure enough for most everyday jackets, vests, and bags.
If the leather is particularly thick or you need greater durability, saddle stitching can provide a stronger connection. It works especially well when the stitch holes have already been prepared.
Whichever method you use:
- Keep the stitch spacing consistent.
- Avoid placing the holes too close together, as a dense row of holes can weaken the leather.
- Keep the thread snug, but not tight enough to wrinkle or pull the leather.
- Follow the patch edge carefully around curves and corners.
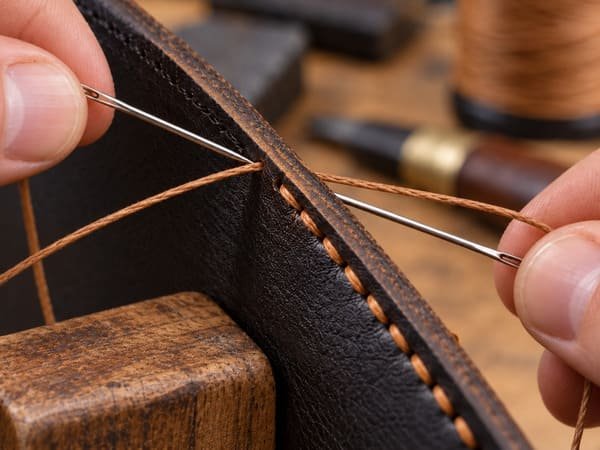
What Is Saddle Stitching?
Saddle stitching uses one length of thread with a needle at each end.
The two needles pass through the same prepared holes from opposite sides, creating a strong and durable hand-stitched seam.
Because of its two-needle construction, saddle stitching can help the seam remain secure even if a section of the thread becomes damaged.
Step 6: Take Extra Care Around Curves and Corners
Slow down when you reach a curve or corner.
Keep the patch flat and adjust the direction of your stitches gradually rather than pulling the patch sideways into position.
Maintain roughly the same stitch spacing as you turn the corner.
If the edge begins to lift or shift, flatten and reposition it before making the next stitch.
Step 7: Secure the Thread and Check the Patch
After sewing around the full edge, bring the thread to the inside and tie a secure knot. Trim the excess thread.
Check that the patch lies flat, the edges are secure, and the leather is not puckering.
If the stitches are already holding the patch firmly, there is usually no need to add another row simply for extra security.
How to Sew a Patch on a Lined Leather Jacket or Vest
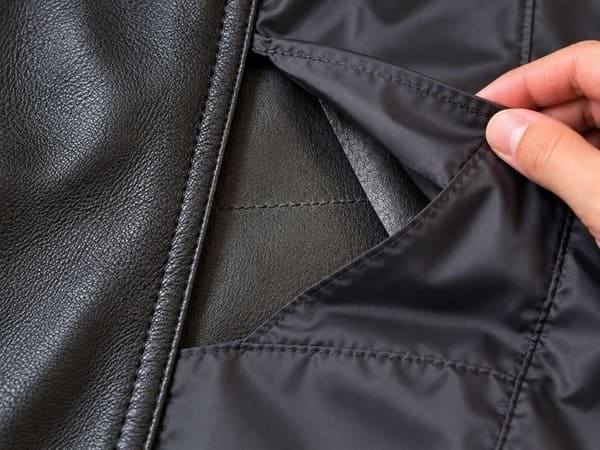
A lining adds another layer to consider because, whenever possible, the patch should be sewn to the outer leather without catching the lining underneath.
If the lining is removable, take it out before sewing. If there is an existing opening that gives you access to the back of the leather, work through that opening instead.
For fully enclosed linings, part of an internal seam may need to be carefully opened so the patch can be sewn directly to the leather and the lining closed again afterward.
Sewing straight through both the leather and lining can leave visible stitches inside the garment, restrict how the lining moves, and sometimes cause puckering.
For an expensive jacket or a lining that is difficult to access, professional help may be the safer option.
Frequently Asked Questions About Sewing Patches on Leather
Yes. An iron-on patch can still be sewn around the border without activating the adhesive with heat. Keep in mind that the backing may make the patch slightly thicker to sew through.
Strong polyester thread is a practical choice for most leather patch projects. It offers good strength and abrasion resistance without adding unnecessary bulk.
A leather needle is a better choice. Regular fine needles can be harder to push through leather and are more likely to bend or break.
A leather needle is a better choice. Regular fine needles can be harder to push through leather and are more likely to bend or break.
Not always. Some holes may become less noticeable over time, but you should treat them as potentially permanent and confirm the patch position before sewing.
Final Tips for Sewing Patches on Leather
A clean leather patch installation does not depend on complicated techniques. It mostly comes down to careful placement, the right needle and thread, even stitching, and avoiding unnecessary holes.
Take your time before the first stitch, keep your tension controlled, and let the patch sit naturally against the leather rather than forcing it into place.
And if you are creating custom patches specifically for leather jackets, vests, bags, or other leather products, tell us how you plan to attach them. We can consider the border, backing, thickness, and sewing area from the beginning so the finished patch is easier to use when it reaches you.