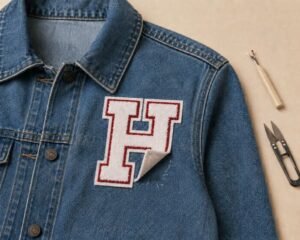
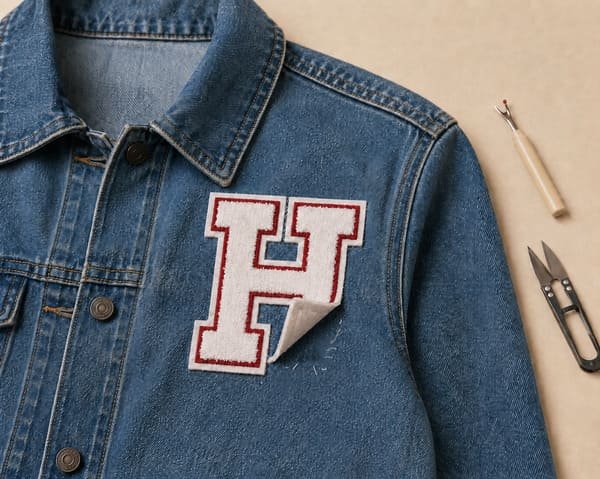
A sew-on patch is designed to stay firmly in place, but that does not mean it has to stay there forever. Whether you want to replace an old logo, reuse a favorite patch, or simply give a garment a cleaner look, most sew-on patches can be removed safely with the right method.
The most important rule is simple: cut the stitches that attach the patch to the fabric instead of pulling the patch away. Before you start cutting, first take a moment to check how the patch is actually attached. What looks like a simple sew-on patch may also have adhesive underneath—or may not be a separate patch at all. Identifying this first will help you choose the right removal method.
Before You Start: Identify How the Patch Is Attached
How to Tell How the Patch Is Attached
Start from the back of the garment. First, look for stitching that follows the outline of the patch.
If you cannot see attachment stitches around the patch, it may be attached with adhesive rather than sewing.
If the back of the garment shows stitching across the entire design, rather than only around the patch edge, you may be looking at direct embroidery. In this case, the design is stitched directly into the garment, so there is no separate patch to remove as one piece.
If you can see stitches attaching a separate patch, gently pull the garment fabric away from the center of the patch. For a larger patch, check several areas because additional stitches may have been added through the middle to keep the patch flat.
- If the center separates freely from the garment, it is most likely a pure sew-on patch.
- If most of the patch surface remains bonded to the fabric even after you separate the stitched edge, it may be sewn on over an iron-on backing.
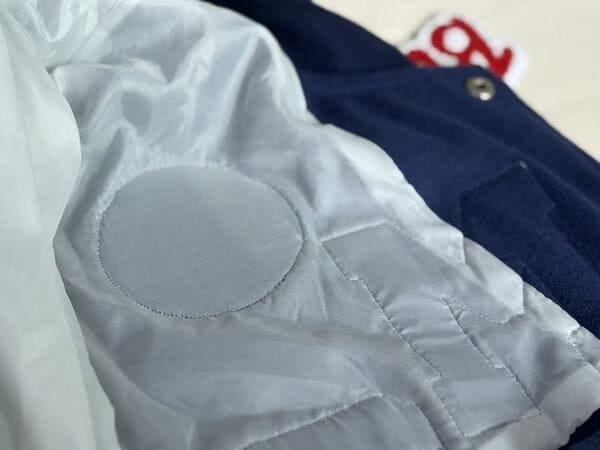
This quick check tells you whether you can continue with a normal sew-on removal process or whether another attachment method also needs to be considered.
Check the Fabric and Garment Condition
Take a moment to inspect the fabric before cutting anything.
Thin, soft, delicate, weakened, or stretchy fabrics need more care because stitch holes and pulling marks can be easier to see afterward.
If the garment is valuable, vintage, extremely delicate, or difficult to access from the back, professional alteration may be safer than trying to remove the patch yourself.
How to Remove a Sew-On Patch Safely
Before Cutting: Prepare the Patch and Your Work Area
Before cutting any stitches, place the garment where you can clearly see both the patch and the surrounding fabric. Good lighting is especially helpful when the attachment thread is close in color to the garment or patch border.
A seam ripper, fine-tip tweezers, small embroidery scissors, and tape or a lint roller are useful for most removals. If you do not have specialist tools, choose the smallest and most precise scissors available.
Avoid large household scissors, knives, or utility blades. They offer much less control in the narrow space between the patch and fabric.
Step 1: Start from the Back
In our experience, starting from the back of the garment is usually the safest option because the attachment stitches are easier to identify.
Find a section where the sewing line is clearly visible. Carefully place the seam ripper underneath one or two attachment stitches and cut them.
Step 2: Create a Small Gap
Once a few stitches have been released, gently separate the patch from the garment to create a small gap.
This makes the next stitches much easier to identify. When the patch and garment are slightly separated, you can clearly see which threads are connecting the two layers, reducing the risk of accidentally cutting the fabric or the patch itself.
If you cannot create any gap, do not force it. There may still be additional stitches or adhesive holding the patch in place.
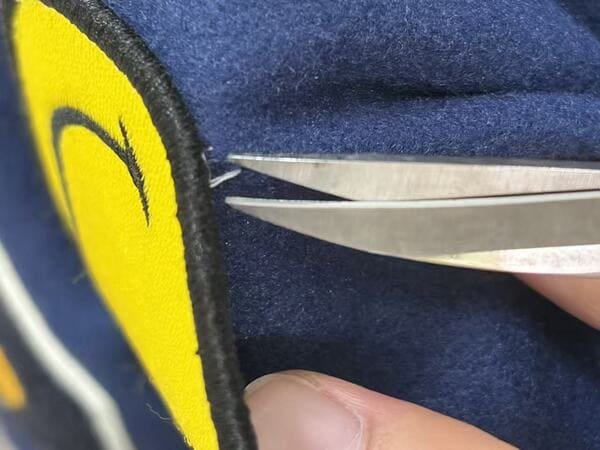
Step 3: Cut the Stitches Gradually
Continue cutting the attachment stitches in small sections.
We strongly recommend not cutting only a few stitches and then pulling the rest of the patch away. Even when the sewing appears to use one continuous thread, the remaining stitches usually will not release cleanly under force.
Instead, pulling can drag the stitches against the fabric, enlarge the existing needle holes, stretch the material, or even cause a tear.
Step 4: Lift the Patch Slowly
As you release more stitches, gently lift one edge of the patch.
A properly released sew-on patch should come away with very little resistance. If one area still feels firmly attached, stop and inspect it rather than pulling harder.
There may be another attachment stitch, additional sewing through the center of the patch, or adhesive underneath.
Step 5: Remove Loose Threads and Inspect
After the patch comes off, use tweezers to remove the remaining thread pieces. Tape or a lint roller can help pick up very small fragments.
Then inspect both the garment and the patch. Check for enlarged needle holes, stretched fibers, fraying, missed stitches, or damage to the patch border.
What If the Stitches Are Cut but the Patch Still Will Not Come Off?
If the visible edge stitches have been removed but the patch still will not lift away, there are usually two things to check: additional stitches through the patch itself or adhesive underneath it.
Check for Additional Stitches Through the Patch
Once those remaining attachment threads are cut, a pure sew-on patch should normally lift away with very little force.
First, check whether the patch is still being held by additional sewing.
This is particularly worth checking on larger patches. To help prevent a large design from bubbling during use, additional attachment stitches may sometimes be added through the middle rather than only around the outer edge.
Gently lift different areas of the patch. If the edge feels free but one or two specific areas still resist, look closely for these additional stitches before pulling any further.
Check Whether Adhesive Is Holding the Patch
If the patch does not resist only in one area, but instead feels bonded across much of its surface, adhesive may also be present underneath.
Using both iron-on backing and sewing is not the most common setup, but it can happen. For example, sewing may be added after an iron-on bond starts to weaken, or after someone decides they want the patch to stay in place for longer or withstand frequent washing.
In DIY applications, a patch may also be ironed into position first and then sewn so that it does not shift during stitching.
If you confirm that adhesive is present, do not continue treating it as a pure sew-on patch. Finish removing the attachment stitches first, then use a method suitable for the adhesive and garment fabric.
We will cover how to remove iron-on patches and adhesive safely in a separate guide.
What to Do After the Sew-On Patch Is Removed
Removing the patch successfully does not always mean the fabric will immediately look untouched.
Some marks are completely normal.
Needle Holes, Puckering, and Fabric Impressions
Small needle holes or a faint outline of the stitching may remain after removal.
On many woven fabrics, gently pressing the area with a slightly warm iron can help the fibers settle closer to their original position. Avoid high heat and always follow the garment care instructions.
Gentle steaming or normal washing may also help minor puckering or flattened areas.
Heavy fabrics usually hide these marks relatively well. Thin or delicate materials may continue to show them, while holes left in leather are generally permanent.
Why a Patch-Shaped Color Difference May Remain
Sometimes the patch comes off perfectly, but its previous location is still clearly visible because the color looks different from the rest of the garment.
This does not necessarily mean anything went wrong during removal.
The surrounding fabric may have been exposed to washing, friction, daily wear, and sunlight for months or years. The fabric underneath the patch was protected during that same period.
Once the patch is removed, that difference becomes visible.
If the color difference remains obvious, placing another patch over the area is often a cleaner and more practical solution than trying to make the old outline completely disappear.
Can You Reuse a Sew-On Patch?
Yes. If the patch remains complete and was not damaged during removal, it can usually be used again.
Check the embroidered surface, border, backing, and overall shape. Make sure there is no obvious fraying, deformation, or accidental cutting around the edge, and remove the remaining attachment threads before reinstalling it.
The patch does not necessarily have to be attached in the same way again. A patch in good condition can be sewn onto another item or prepared with a different backing, such as iron-on, hook-and-loop, or self-adhesive backing.
If it is badly faded, visibly distorted, damaged, or contains an outdated company or brand logo, replacing it with a new patch will normally give you a cleaner result.
Be especially careful around merrowed borders and satin-stitched borders during removal. These stitches belong to the patch itself. If you accidentally cut them instead of the attachment thread, the border can loosen or fray and the patch may no longer be suitable for reuse.
When Should You Stop Removing the Patch?
Stop if the fabric begins to tear, the needle holes are becoming noticeably larger, or the material is too delicate to separate safely.
You should also stop if you discover that the design is direct embroidery rather than a separate sew-on patch.
For uniforms, team apparel, workwear, branded jackets, or logo updates, a correctly sized new patch can sometimes cover the old area more cleanly than trying to make every previous stitch mark disappear.
Does Fabric Type Affect Patch Removal?
The basic removal method stays the same, but some fabrics are much more forgiving than others.
Denim, Canvas, and Other Heavy Fabrics
Denim, canvas, workwear fabrics, and other heavier woven materials generally handle sew-on patch removal better.
Their thicker structure means small needle holes are usually less noticeable after the patch is removed.
You should still avoid pulling. Strong fabric can also become distorted if several remaining stitches are dragged through it at once.
Lightweight, Stretch, and Knit Fabrics
Thin cotton, lightweight polyester, knits, fleece, stretch fabrics, and other softer materials require more precision.
Puckering, stretched areas, snagging, and enlarged stitch holes are more likely to remain visible.
Work in smaller sections and keep tension low. If a stitch is extremely tight, small embroidery scissors may sometimes give you better control than trying to force a seam ripper underneath it.
Leather and Delicate Materials
Leather requires special consideration.
Unlike a woven fabric, leather does not naturally close around a needle hole in the same way. Once the stitching is removed, the perforations may remain permanently visible.
If the item is valuable or the original stitching is very dense, consider whether removing the patch is really the best option. In some situations, covering the old area with a new patch gives a cleaner result.
Frequently Asked Questions About Removing Sew-On Patches
Usually, at least temporarily. Heavy woven fabrics often hide or recover from small stitch holes better, while thin fabrics and leather may show them more clearly.
Yes. Small, sharp scissors can also work if you can clearly see the attachment thread and control the cutting area.
Check for additional stitches through the center or hidden attachment points. The patch may also have iron-on adhesive underneath it.
Yes, but take a little extra care. Leather does not close around stitch holes like woven fabric, so some marks may remain visible after removal.
Yes. If the original area has visible holes, color differences, or other permanent marks, covering it with a new patch is often a practical solution.
A Few Final Notes
Removing a sew-on patch safely is mainly about identifying how it is attached and working slowly. Start from the back when possible, create a small gap, cut only the attachment stitches, and stop whenever you feel unexpected resistance.
Once the patch is removed, you can keep the garment as it is, reuse the original patch, or cover the old area with a new design.
If you need a new patch for a uniform, jacket, team, brand, or another project, we can customize the size, border, backing, and attachment method to match how you plan to use it.